Visiting timetableClosed
|Sunday, June 28, 20261-1-2 Oshiage, Sumida City, Tokyo, Japan
Back to travel
photography
Best Tokyo Skytree Photo Spots – Day & Night
Find the most photogenic spots for Skytree: Azumabashi, Sumida Park, rooftops, and observatory angles with gear and settings advice.
1/25/2026
15 min read

From classic bridge frames to mirror-like river reflections, these are the angles that deliver. Bring a microfiber cloth and a dark hoodie — glass is everywhere.
Top Locations (Day & Night)
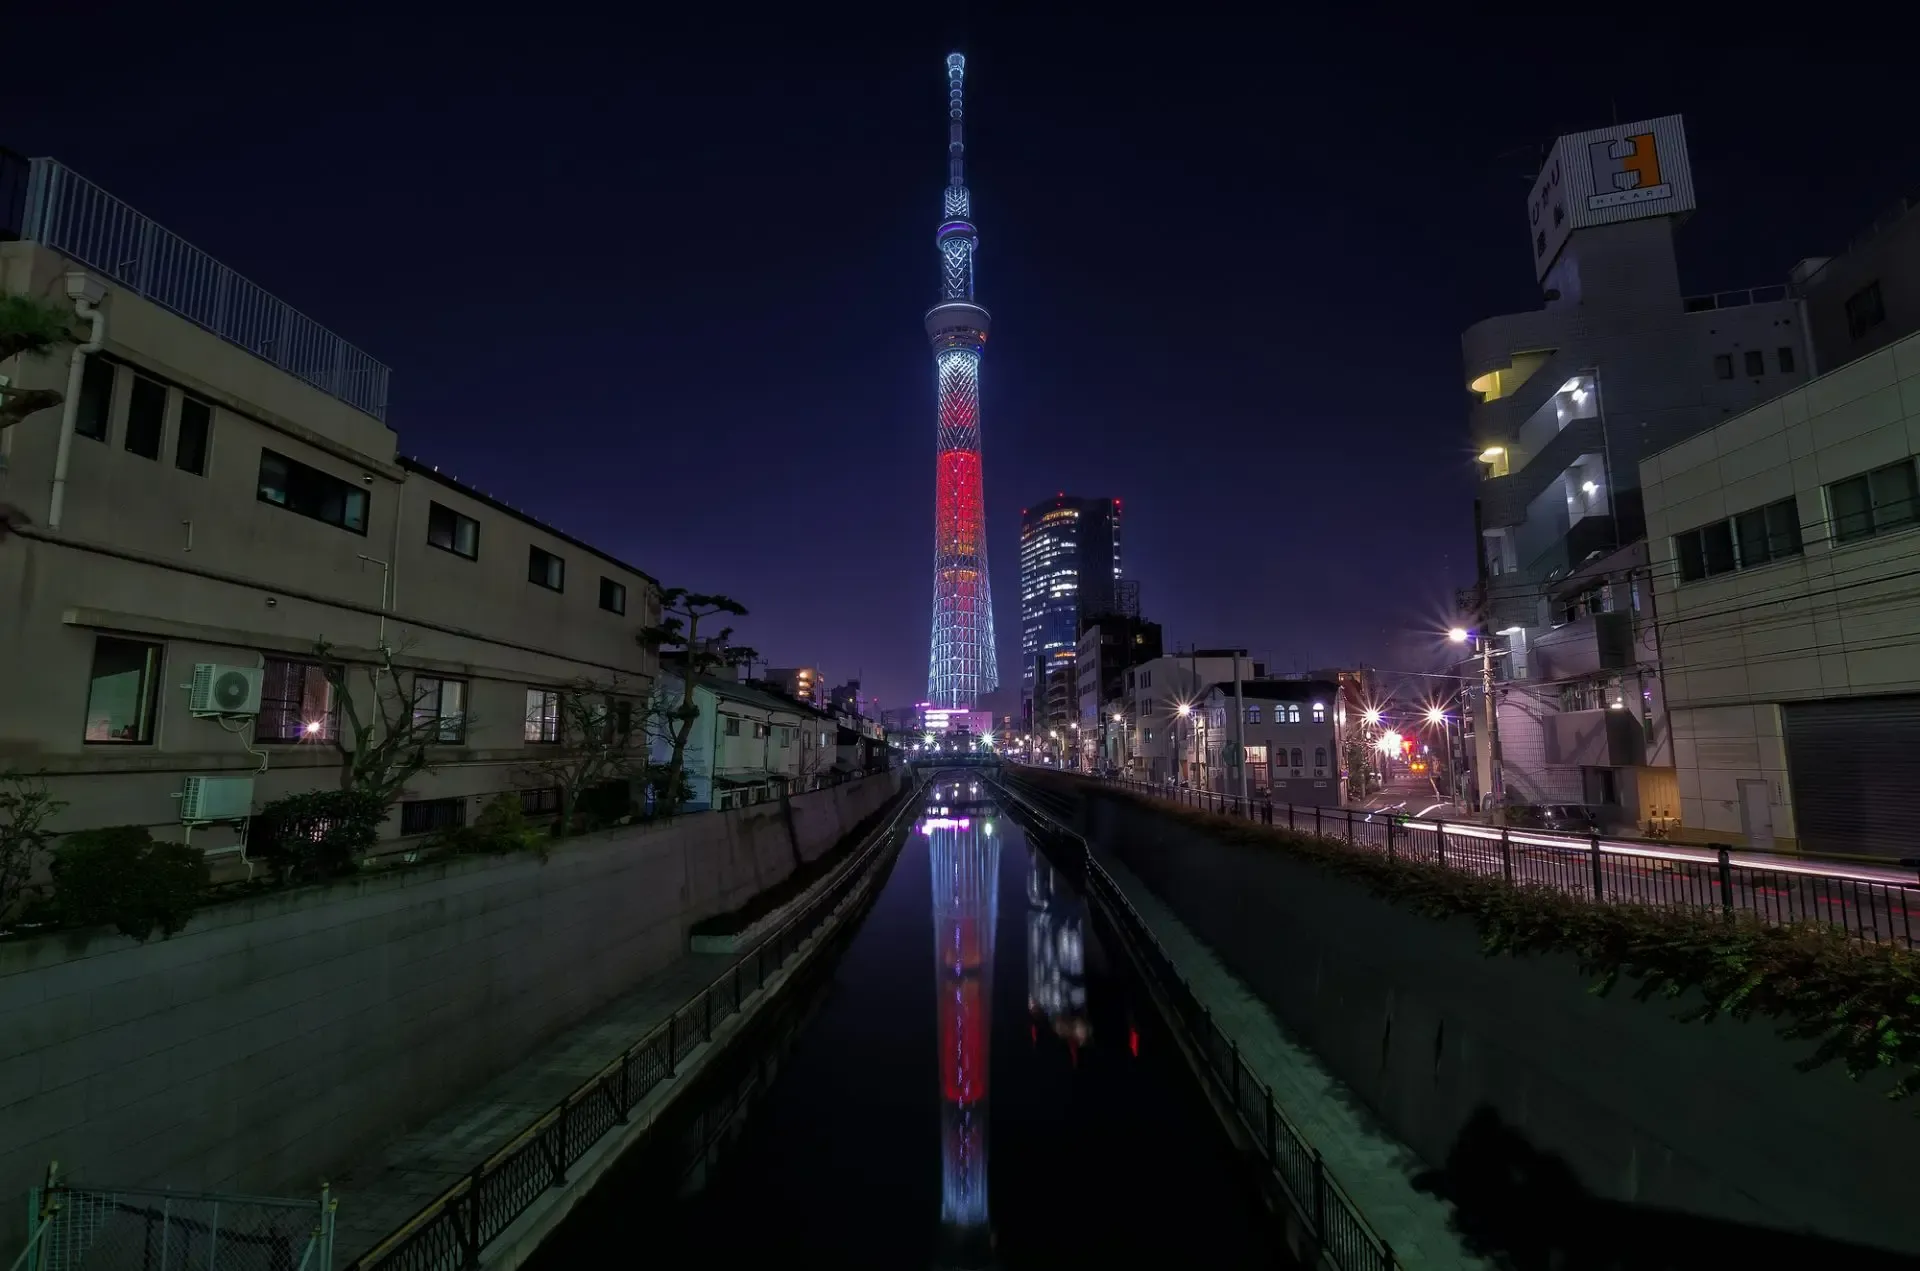
- Azumabashi Bridge – red rails, wide river, tower centered.
- Jukkenbashi Bridge – tighter framing at night.
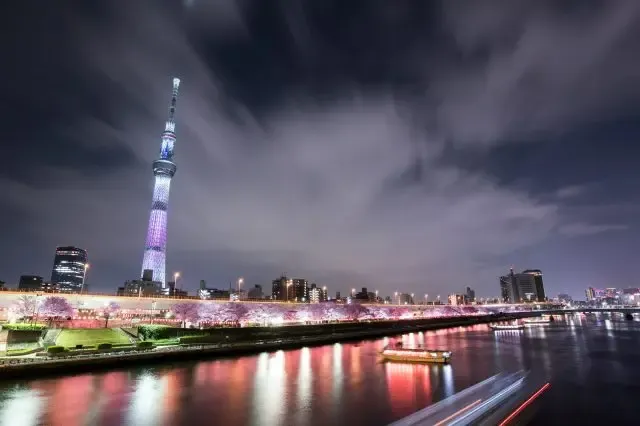
- Sumida Park – seasonal colors; cherry blossoms in spring.
- Oshiage rooftops – lines and patterns.
- Street-level leading lines – alleys looking up.
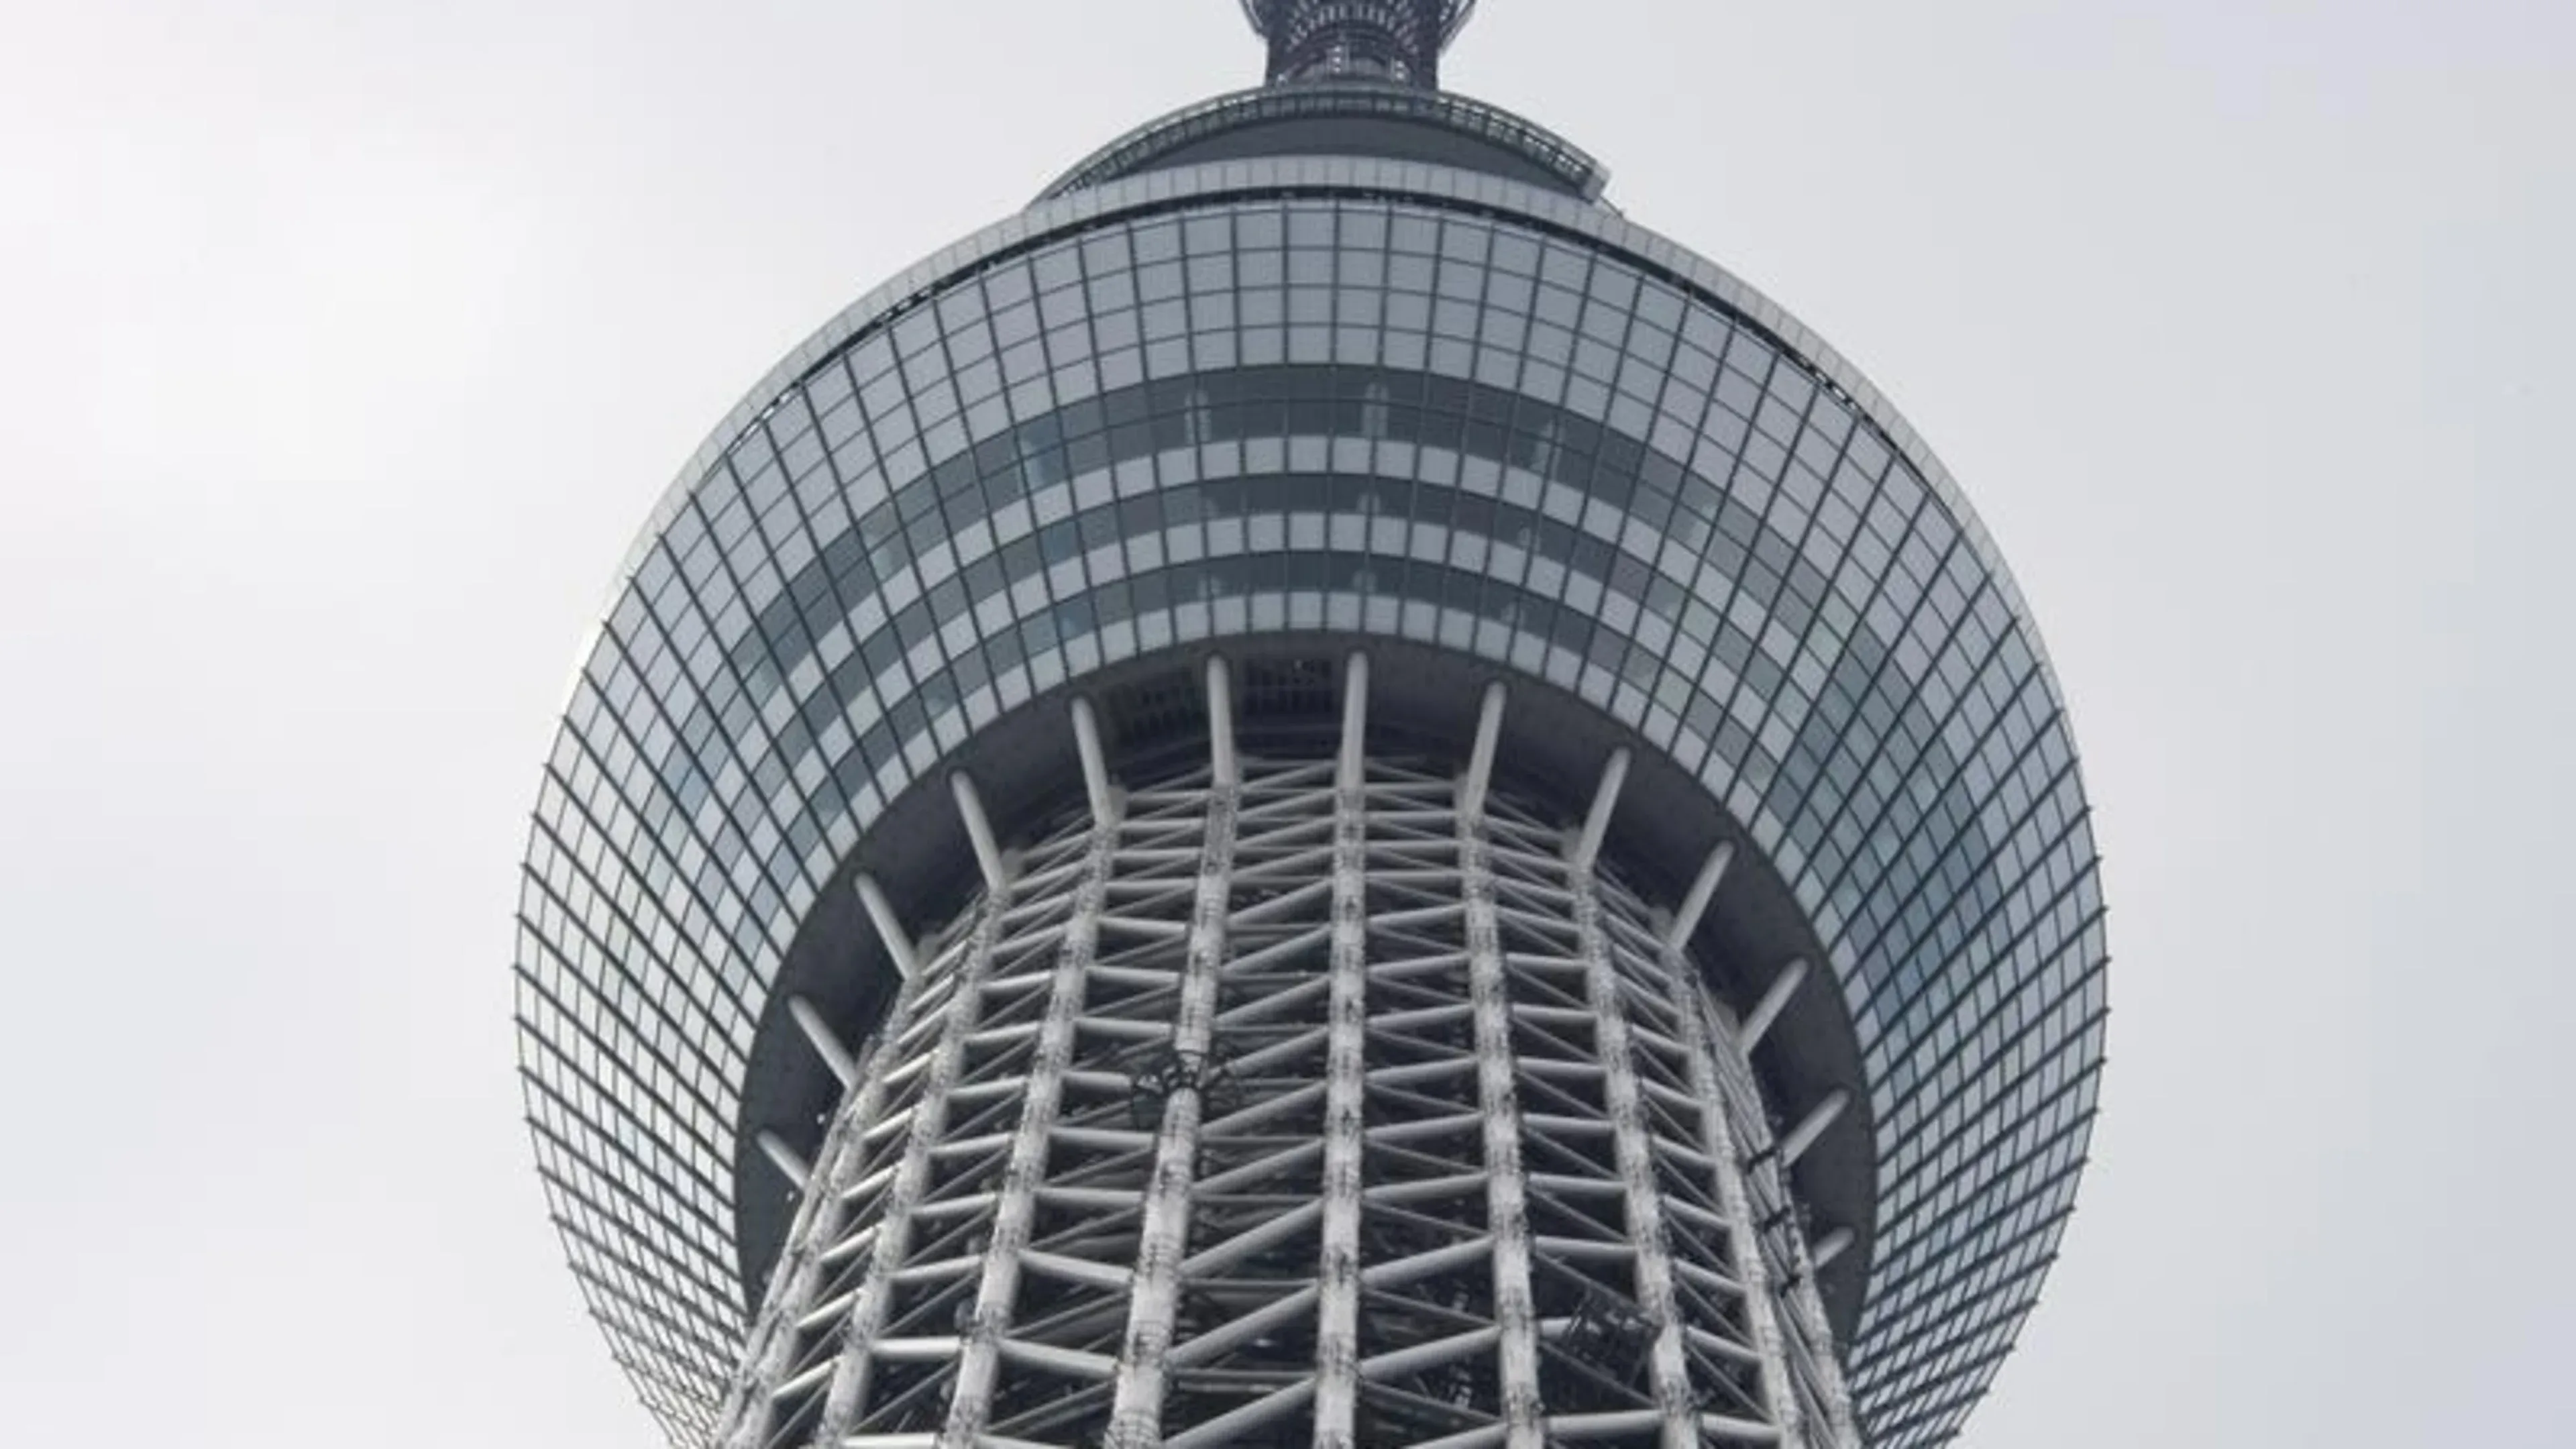
- Tembo Deck – blue hour panoramas.
60-Minute Photo Route
Start: Sumida Park (golden hour)
→ Azumabashi (sunset)
→ Jukkenbashi (blue hour long exposures)
Finish: Deck interiors (night grid)
Gear & Setup
- Phone with night mode or camera with fast prime (f/1.8–2.8).
- Small rubber lens hood (for glass shots).
- Mini tripod or wrist strap; 2-second timer.
Lens Choices
| Situation | Lens | Why |
|---|---|---|
| River reflections | 24–35mm | Wider frame, stable lines |
| Street-leading lines | 24–50mm | Perspective with minimal distortion |
| Deck skyline | 24–70mm | Versatility through changing light |
| Fuji chase | 70–135mm | Compresses skyline with Mt. Fuji |
Anti-Glare Tricks
- Wear a dark hoodie; press against glass to kill reflections.
- Cup the lens with your hand/hood to block ambient light.
- Kill nearby screen brightness and watch out for neon signage.
Long exposure on bridges: stabilize on the rail, use a 2s timer; mind pedestrians and cyclists.
Exposure Recipes
Blue hour cityscape: ISO 200, f/5.6, 1/10s
Night skyline (handheld): ISO 1600, f/2.8, 1/60s
River reflection (tripod): ISO 100, f/8, 10–20s
Composition Playbook
- Use rails/paths as leading lines to anchor the tower.
- Frame-within-a-frame using alleys or overhangs.
- Embrace negative space for minimalist night shots.
Legal & Etiquette
Tripods may be restricted in some areas; follow staff guidance and keep foot traffic moving. Do not block stairwells or crowd flow.
About the Author

Tokyo Travel Expert
I built this Skytree guide to keep your visit simple, spacious, and full of small, helpful tips — from transport to timing to where to linger for the best light.
Tags
Photography
Night
Bridges
Parks
Comments (0)
Leave a Comment
Loading comments...